There’s hiking in Yosemite—and then there’s Half Dome. If you’re planning to summit this legendary granite monolith, you are in for an adventure of a life-time.
The Half Dome hike is a bucket-list experience blending stunning scenery with a serious physical challenge. Preparation is everything—get a permit, plan your travel, respect the mountain, plan ahead for the big day, and you’ll stand on top with a story to tell. Safe hiking!
My dad and I hiked from the Happy Isles Trailhead and spent effectively 12 hours roundtrip hiking and taking in the scenery. In the section below, we break down and describe the hike itself, based on our experience. We also provide helpful tips as we go. Then, in the subsequent section, we provide an outline of the options for getting a permit, accommodations, gear, etc., and provide hints and tips for your preparation.
🏞️ The Hike
There just aren’t enough superlatives to adequately describe this hike. I have been on many hikes in many states and in other countries but the hike to Half Dome is… well, pick a superlative. So we will just go section by section and give you an idea of what’s in store, focusing on helpful info.
This trek is strenuous, even if you are in good shape. As is often the case with steep trails with plenty of altitude gain, the descent is as tough on the legs as the ascent. Keep that in mind as you prepare and as you hike.
🗺️ Trail Overview
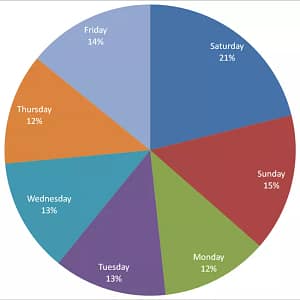
- Distance: 14 to 16.5 miles round trip (depending on the route)
- Elevation Gain: ~4,800 ft (1,463 m)
- Time Required: 10–14 hours
- Permit: Required when the cables are up (typically late May to early October)
📍 Starting Point: Yosemite Valley – Happy Isles Trailhead (Mile 0)
The journey to Half Dome begins at Happy Isles in Yosemite Valley, a short walk or shuttle ride from Curry Village. Most hikers start before dawn, with headlamps guiding the way into the early morning wilderness. Eat a big breakfast and bring plenty of snacks.
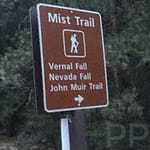
After about a mile, the John Muir Trail splits off to the right and the Mist Trail continues up toward Vernal Falls. Most people take the Mist Trail at this point. But if you take the John Muir, it rejoins the Mist Trail above Nevada Falls. We elected to take the Mist Trail both up and back down.
🌊 Mist Trail to Nevada Falls
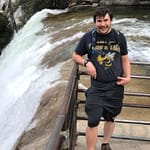
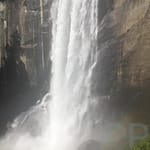
The first few miles take you up the famous Mist Trail, a steep, paved path featuring many flights of stairs climbing alongside Vernal Falls. Prepare to get soaked as spray from the roaring waterfall drifts over the trail. Granite steps lead you to the top of the falls (mile 1.2), where you’ll find beautiful views and a chance to rest.
This is a grueling climb, but it’s early so likely your legs feel fresh. Seeing your progress as you climb Vernal Falls is rewarding. If you start late, this area may be crowded as it is popular for casual hikers, but crowds will thin as you climb the falls.
Continue upward past Nevada Falls (mile 2.7, via Mist Trail), where the trail becomes dustier and less crowded. At the top of the falls, you can stop at Little Yosemite Valley (mile 3.8 or 4.8 miles via the John Muir) to refill water (use tablets or a pump to purify the water) and catch your breath. Enjoy views of the Liberty Cap as you climb. Past the top of the falls, there are restrooms attached to the campground in the Little Yosemite Valley.
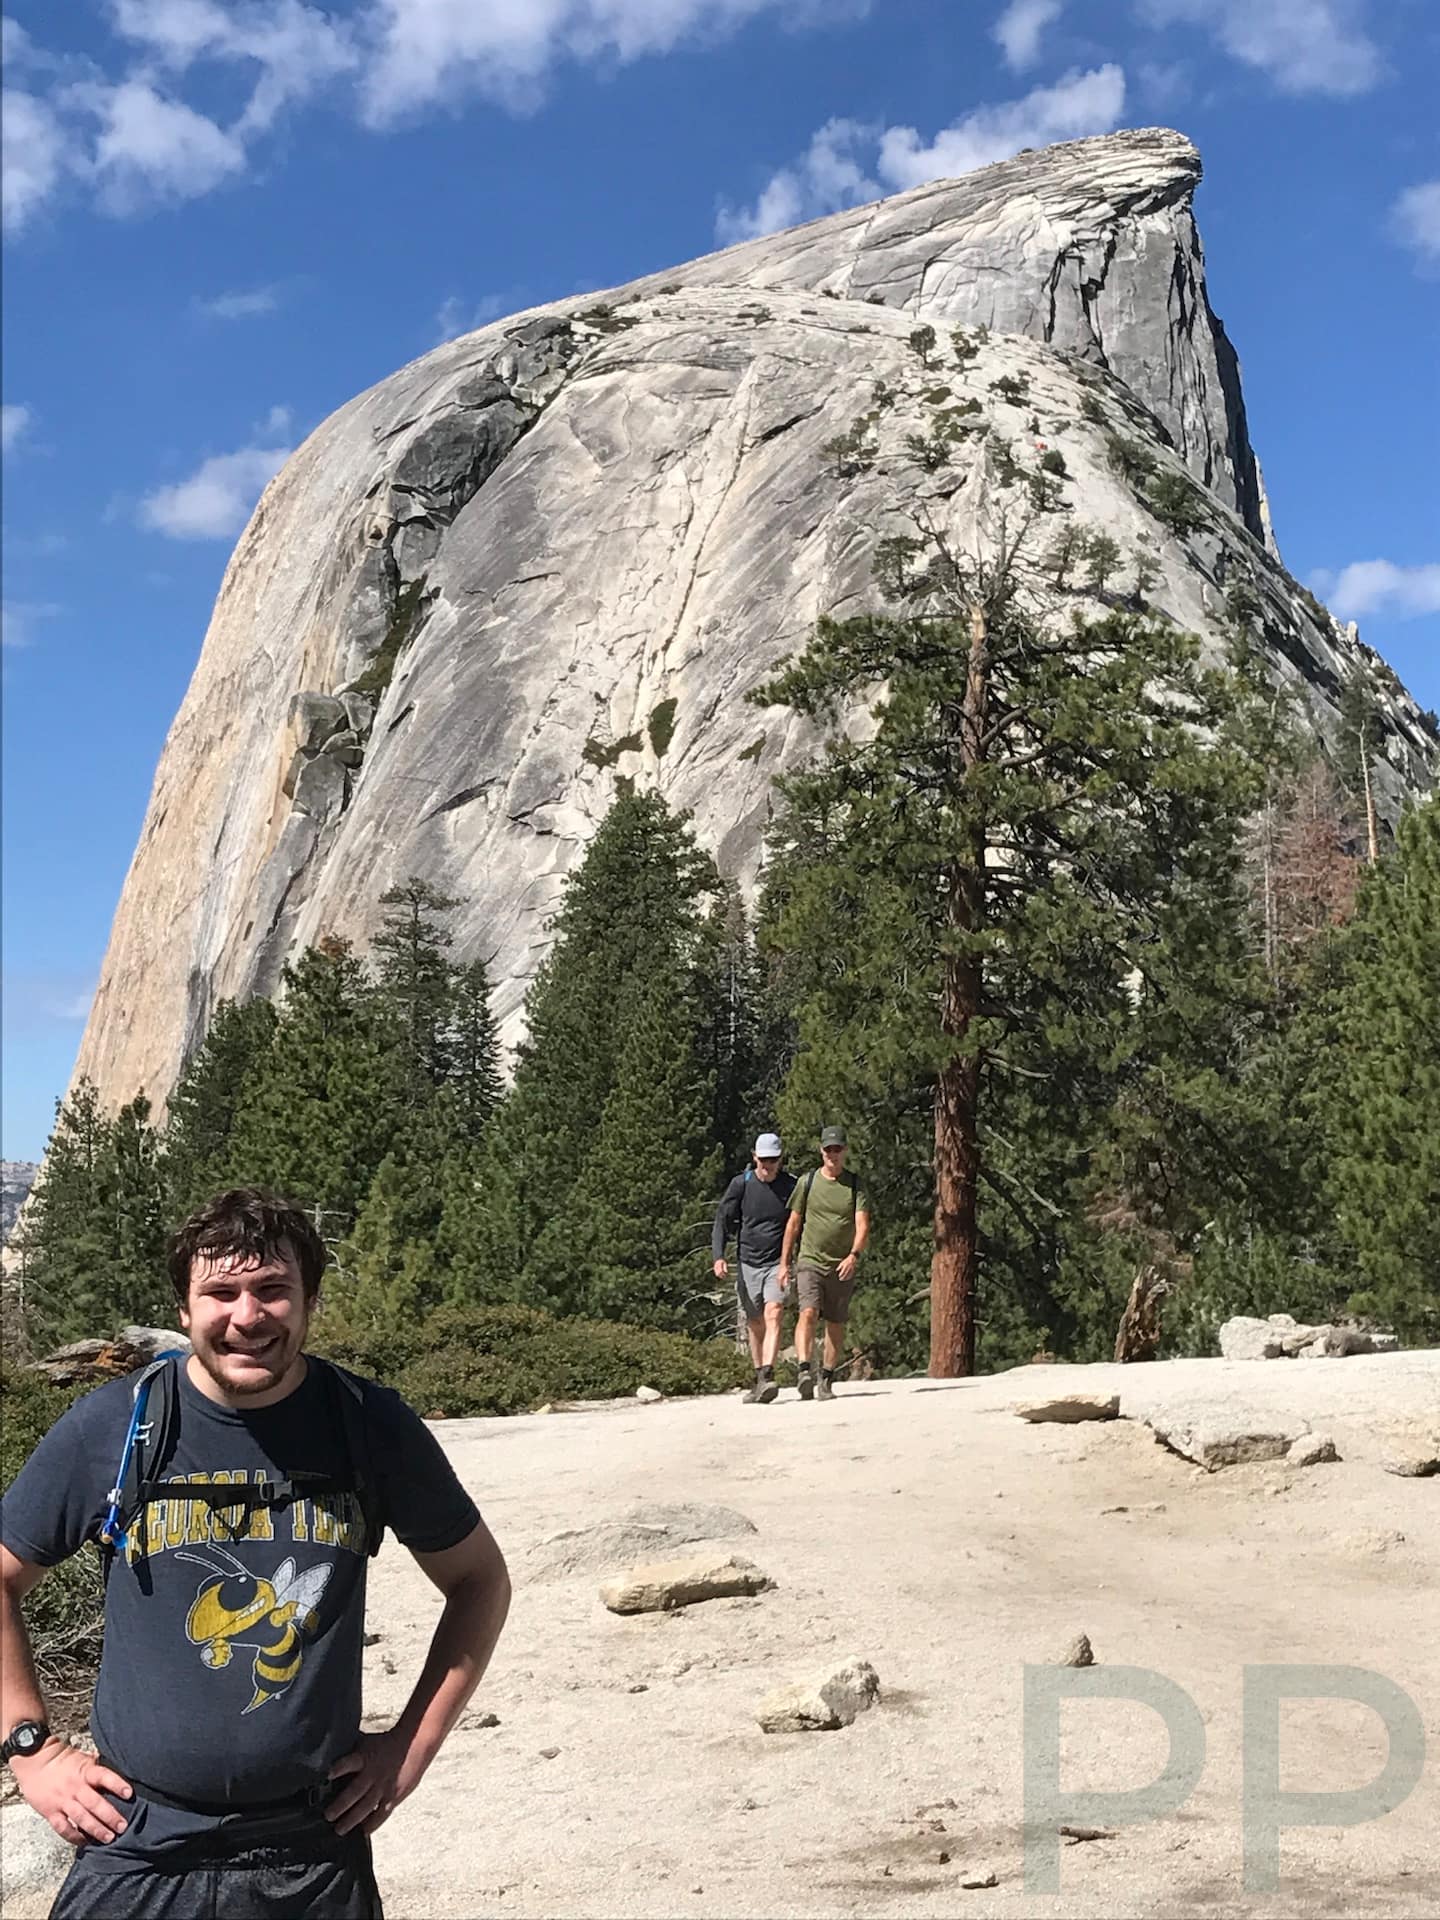
🌲 Forest Trek to Subdome (Mile 6.4)

After Nevada Falls, the trail flattens briefly before a long, steady climb resumes. Before the trail leaves the river, refill your water containers. (See a good spot marked on the map below.)
After about a half mile, once the trail leaves the Merced river, you’ll hike through shady pine forest and may start to feel the elevation in your legs and lungs. After about 2 more miles, you’ll reach Subdome—and the real challenge begins. This wooded section is easily the least descript and least scenic section of the hike and the only section I don’t have extremely fond memories of. But the shade is nonetheless welcomed, both on the ascent and the descent.
🧗♀️ The Subdome and Half Dome Cables
⚠️ Permit Checkpoint (mile 6.4)
A ranger checks for permits (and IDs) just before the base of the Subdome. From here, the hike shifts from merely strenuous to intense.
🔺 Subdome
This section is steep and fully exposed, with no shade or handrails. The switchbacks climb straight up the open granite face. Be sure to look carefully as you hike to stay on the trail. In some places there are arrows painted on the rocks to help you find your way.
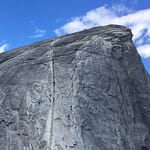
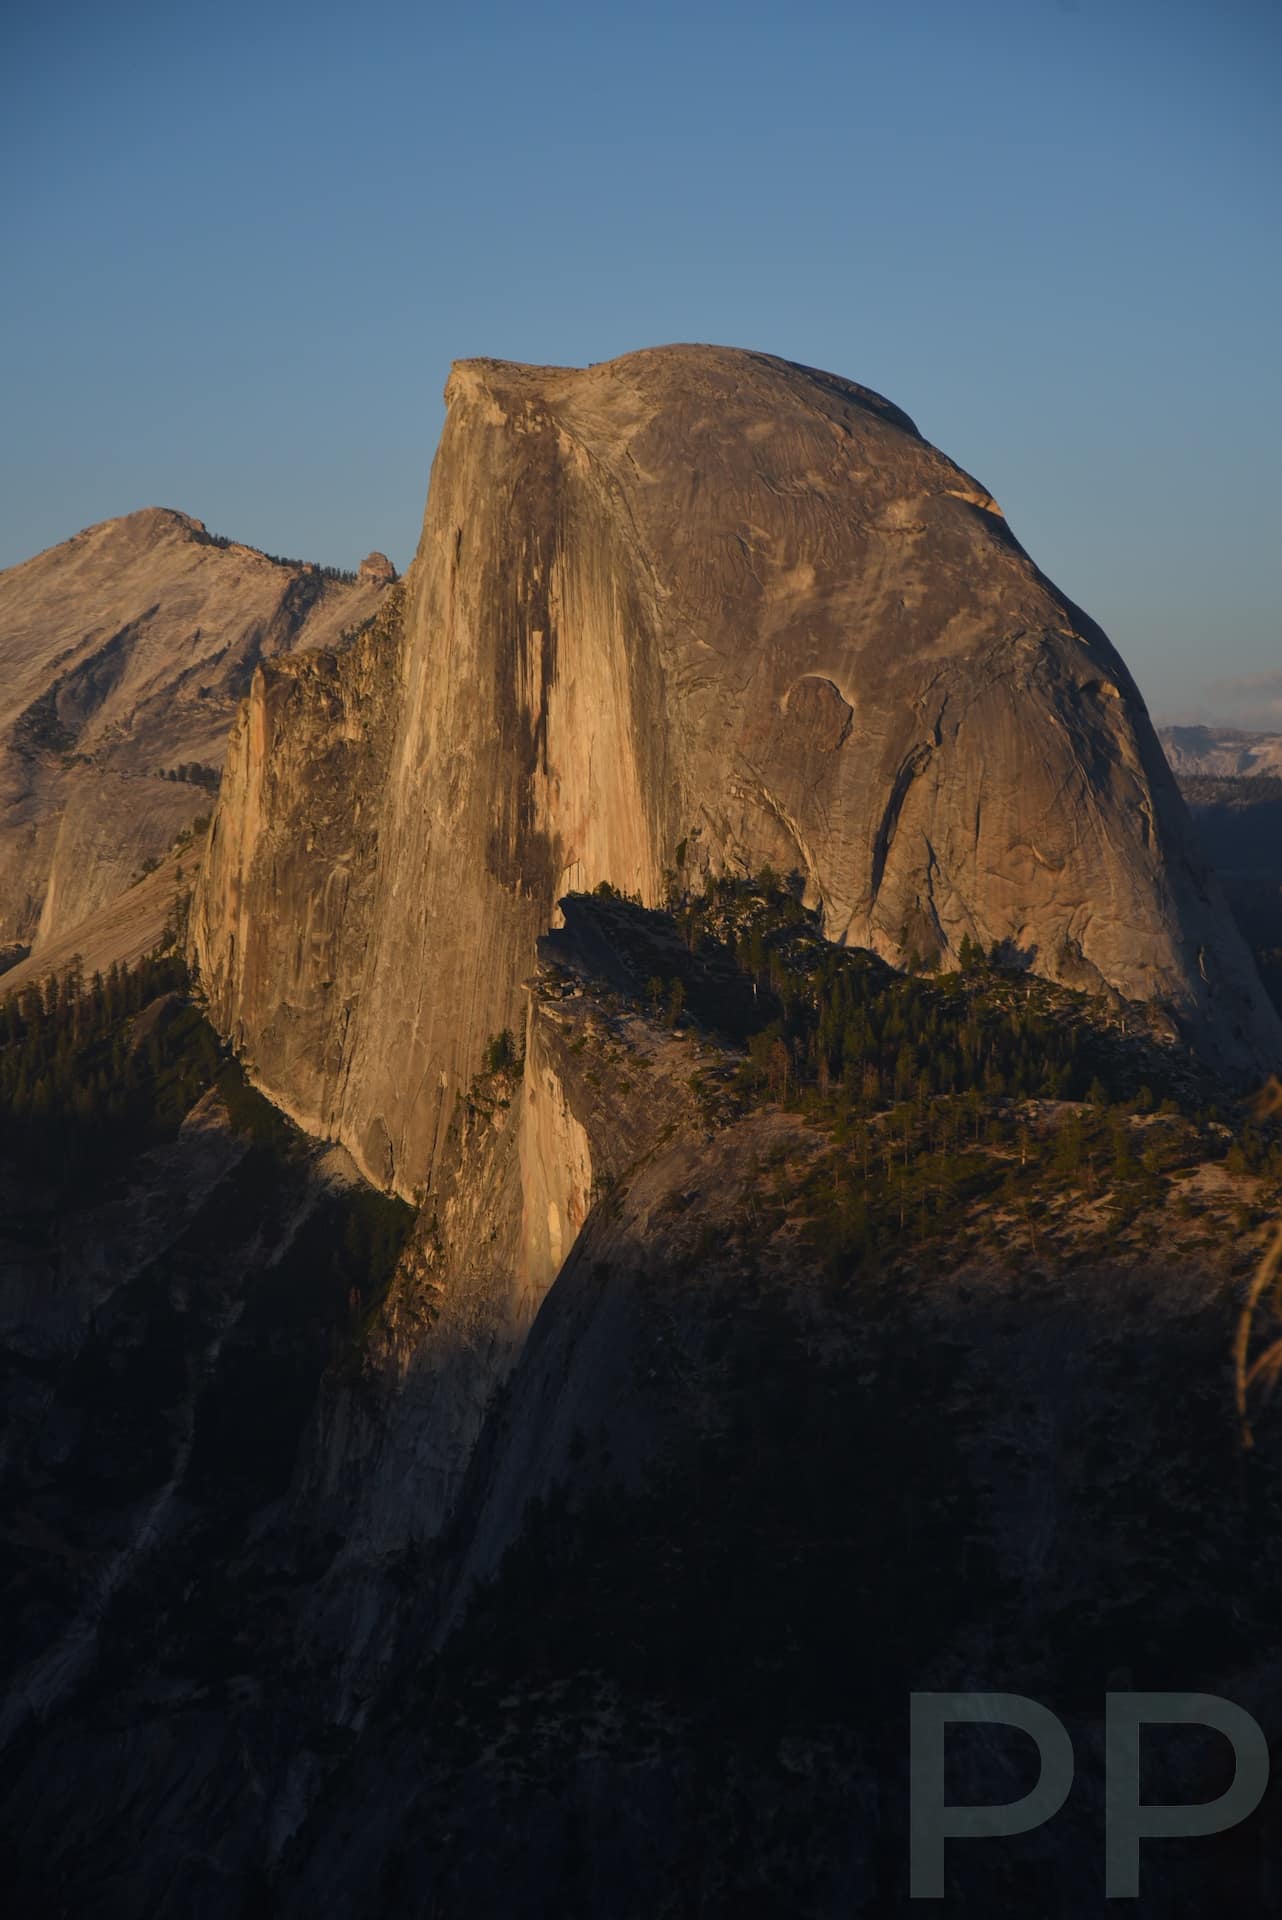
🔩 The Cables (mile 7.0)
At last, you reach the Half Dome cables: two steel wires on metal rods sunk into the rock, stretching the last 400 feet up the dome’s sheer northeast side. Climb carefully, pulling yourself up one section at a time. Gloves are helpful for sure – some say essential. We opted for weight-lifting gloves, protecting our palms but leaving our figure tips exposed. This allows more tactile feel while providing for a firm grip on the cables. The cables aren’t quite as steep as they look in some pictures, so if you’re fit and ready, don’t be intimidated.
A safety harness is optional but used by some. It can provide a sense of security, important for those with a fear of heights. For us, the harness was not desired or needed and would have slowed our pace.
There are wooden boards crossing the path between each set of rods that hold the cables. These boards provide a place for your feet to find purchase and allow you to stand and rest periodically.
If you look down while on the cables, the drop below is nearly vertical. Look up, and the summit beckons. This stretch is not long but it’s intense.
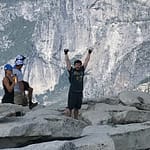
🏔️ The Summit
Congratulations—you’ve made it to one of the most breathtaking views in the world!
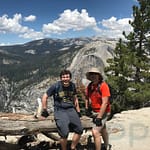
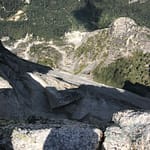
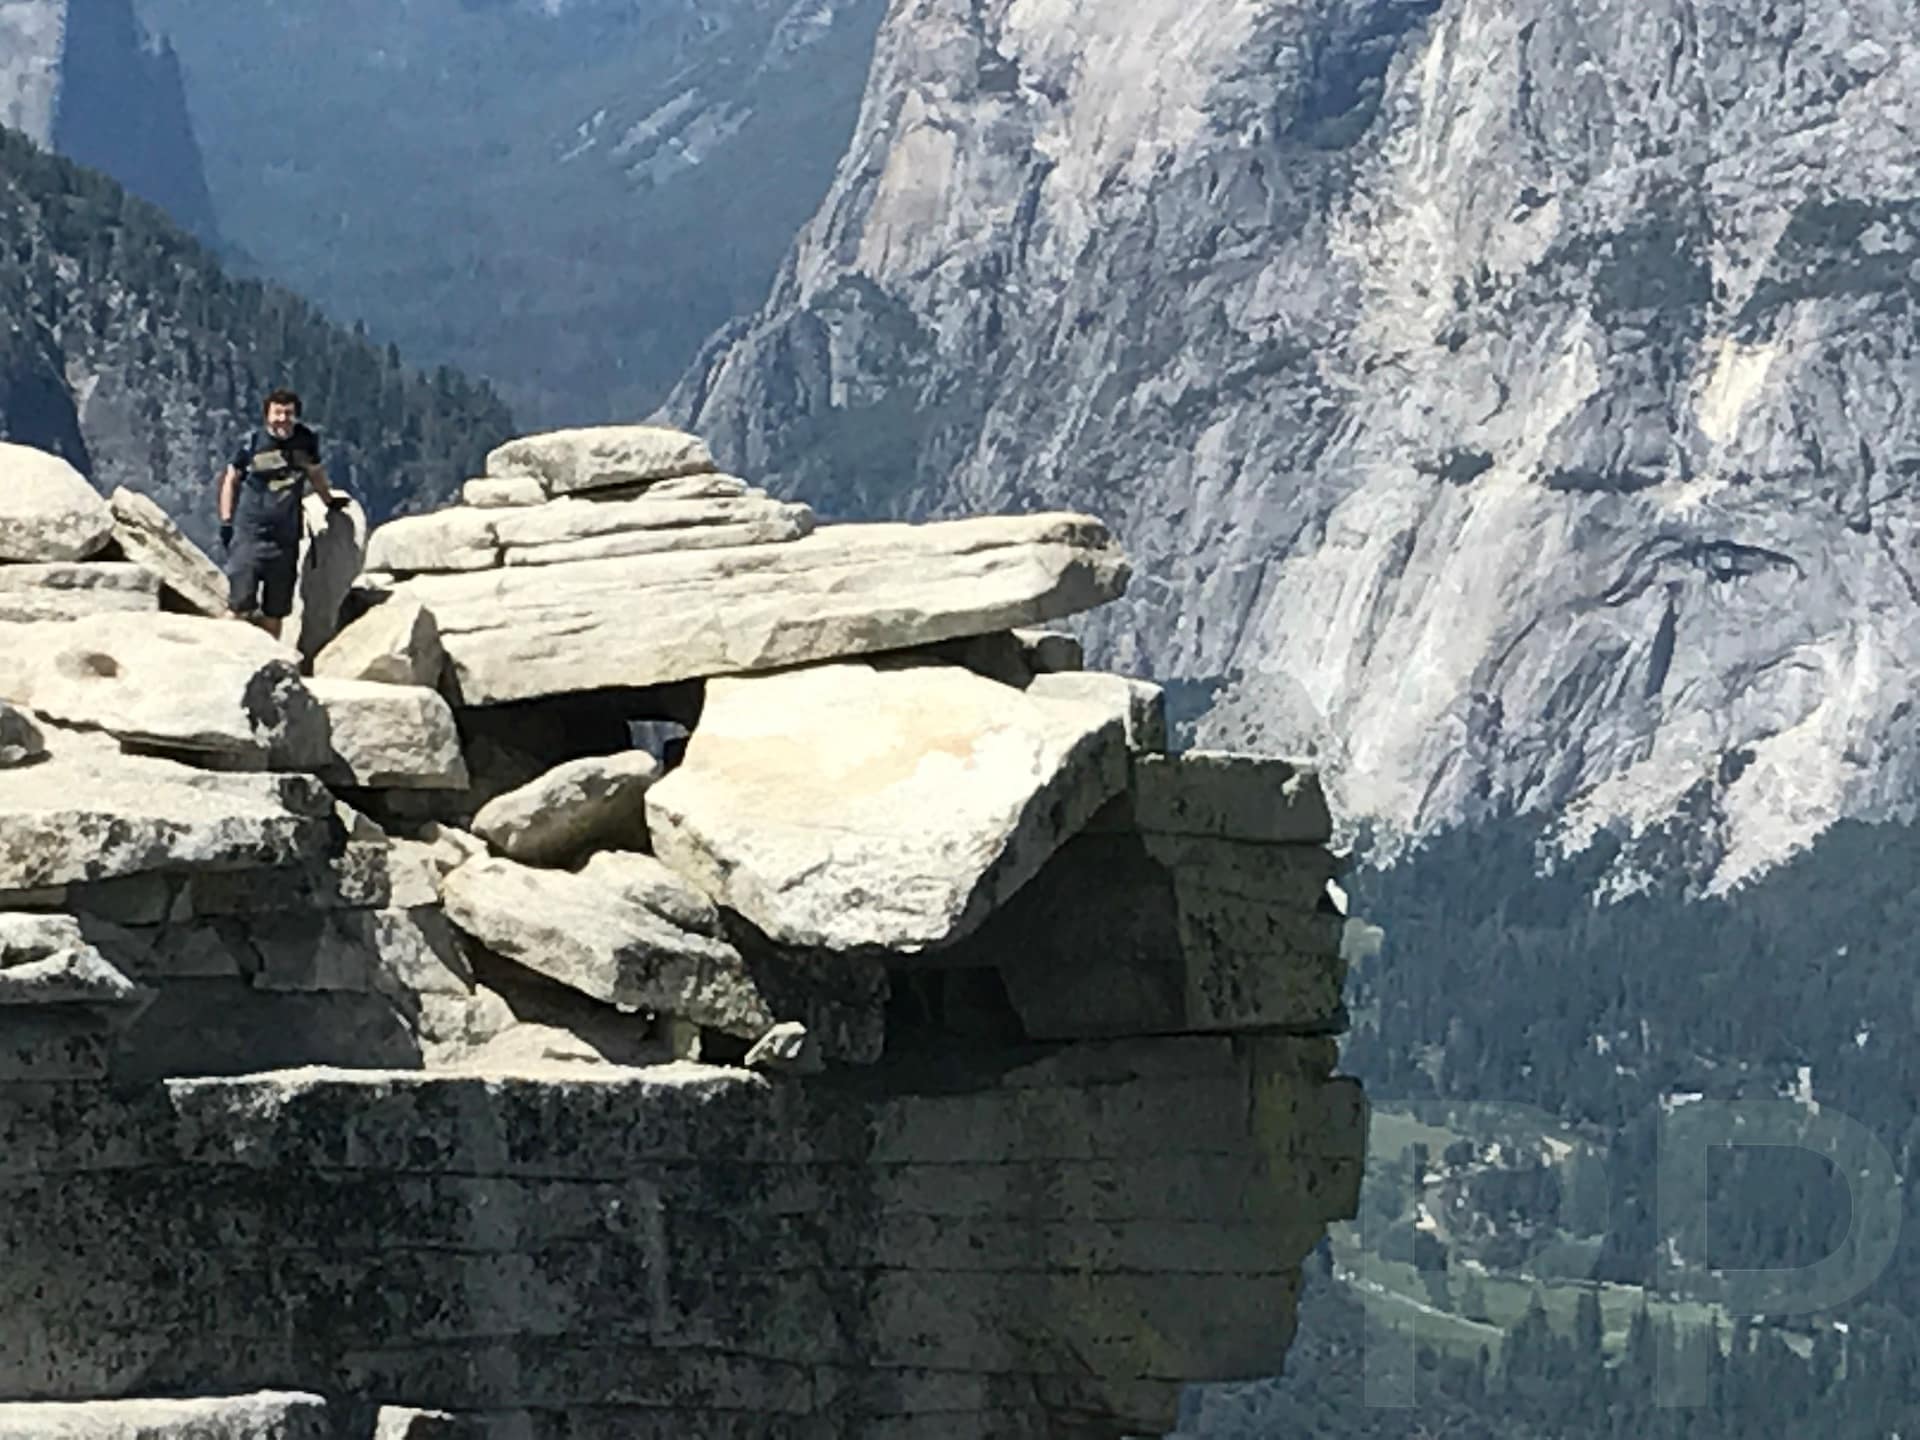
The summit of Half Dome is a flat granite plateau with room to walk, snack, take photos, and most of all, enjoy the view. To the east, you’ll see Clouds Rest and the High Sierra. To the west, Yosemite Valley sprawls out below you, thousands of feet straight down—almost a mile.
Some choose to look out over the edge. I got my phone camera over, but do not necessarily recommend others do the same. There’s no safety net, so prioritize safety.
Take your time at the top. Eat your lunch. Walk around the top and look at the famous valley from above. This is a unique place that is difficult to get to—and beyond amazing. So, soak it in.
But while you are enjoying the vibe and scenery be sure to monitor the weather. Afternoon thunderstorms are common, and rain or lightning on the cables is extremely dangerous. The boot-worn granite gets slick when wet, not just on Half Dome, but Subdome and other parts of the hikes as well. When we checked in at the permit check point, the ranger pointed out the scattered clouds and warned us to watch conditions.
⛰️ Descent: Take It Slow
Heading down the cables is often more nerve-wracking than going up. Descend backward, like climbing down a ladder, and keep a tight grip. Once again, take care to stay on the trail down Subdome, looking for each switchback turn.
For the return hike, many choose the John Muir Trail instead of the Mist Trail. It’s longer (~1.1 mile), but less steep—easier on tired knees. We took the Mist Trail down and had to really watch it on the steep parts between Nevada and Vernal Falls, and after Vernal Falls. Also, the steps and trail near the falls are wet and slippery in places.
For us, the most dicey part of the hike was the descent on the steep stone stairs around the falls. By this point it was 2:30 or 3:00 PM and there were crowds. Trekking poles and patience were needed to avoid a mishap.
Trail Map
The map below is helpful orientation and provides key points and junctions. In particular, note the points for river access for water, near the Little Yosemite Campground. Also, note the campgrounds and trail head parking the valley. (More on accommodations later.)
(Download as a KML file and use in Google Maps, Google My Maps, OpenMaps, or other mobile apps. Start from the full screen view of the map. Click the star next to the map title to view in Googl Maps and then save for later reference.)
Preparation and Reservations
Overview from NPS
The Yosemite NP page has up-to-date information and good tips. We will cover some hints on where to stay, gear, reservations, etc. below but a good place to start is with the NPS hike video.
Conditions and Seasons
- Season: Late May to early October, when the cables are up (typically installed Memorial Day weekend and removed after Columbus Day). Snow and ice make it inaccessible outside this period without mountaineering gear.
- Weather: Summer days can hit 80-90°F in the valley but drop significantly at higher elevations. Thunderstorms are common in afternoons—start early (5-6 AM) to avoid crowds and inclement weather.
- Water: If you don’t want to carry 4 liters for a nearly 5,000 foot climb, the Merced River provides an ample source of water. But a filter (or iodine) is advisable. We left with full 2-liter hydration packs and took a lightweight hiking filter. We refilled our hydration packs after crossing the river above Nevada Falls.
Getting the All-Important Permit for Half Dome
Tip: Have multiple dates in mind; weekends fill fast. Rangers enforce permits—don’t risk sneaking up.
Permits are mandatory 7 days per week when the cables are up (typically late May to mid-October, weather permitting) to hike beyond the base of Subdome and up the cables. A maximum of 300 hikers are allowed daily: approximately 225 day hikers and 75 backpackers. The NPS site provides helpful statistics for the lottery.
There are separate sets of permits for day hikers and backpackers. We will cover day hiker permits first.
Options to Obtain a Day Hiking Permit
There are two options for a day hiking permit: the pre-season lottery and the daily lottery during the season. The pre-season lottery is your best chance and also allows for planning your travel around your permit date.
Preseason Lottery (Main Option)
When: Applications are accepted throughout March (March 1–31, 2025, for the upcoming season).
How:
- Visit recreation.gov/permits and log in or create an account.
- Search for “Half Dome Permits” under Yosemite National Park. (NPS Link: Half Dome Permits for Day Hikers)
- Select the “Preseason Lottery” option.
- Fill out the application: Choose up to 7 date preferences (specific dates or a range) and request up to 6 permits (for 6 people total). Designate a trip leader and an optional alternate (names cannot be changed later).
- Pay the non-refundable $10 application fee.
- Submit by March 31, 11:59 PM Eastern Time.
Results: Notified in mid-April via email or by checking recreation.gov. If successful, pay an additional $10 per person fee.
Daily Lottery (During Hiking Season)
When: Apply 2 days before your desired hike date, from midnight to 4:00 PM Pacific Time (e.g., apply Thursday for Saturday). Runs daily during the cable season.
How:
- Go to recreation.gov/permits and select “Half Dome Permits” and the “Daily Lottery” option.
- Enter your hike date (2 days ahead), request up to 6 permits, and designate a trip leader/alternate.
- Submit application (no fee upfront).
- Check results that evening via email or online. If successful, your card is charged $10 per person.
Availability: About 50 permits/day, based on cancellations/underuse (number varies). Tip: Flexibility with dates improves chances; apply early in the window.
Summary of Key Details
ID Check: The permit holder or alternate must carry a government-issued ID matching the permit name and show it to rangers at Subdome (along with a paper or downloaded copy of the permit—cell service is spotty).
Cancellation: Cancel by 11:59 PM the day before your hike for a refund of the $10/person fee (not the application fee) via recreation.gov.
Permits for Backpackers
Tip: Apply for midweek dates (e.g., Tuesday or Wednesday) in late May/early June or late September/October for better odds—weekends and peak summer are most competitive.
Backpackers with a wilderness permit need an additional Half Dome permit to climb the cables (about 75 permits/day allocated). This applies if you’re camping overnight (e.g., in Little Yosemite Valley) as part of your trip.
Secure a Wilderness Permit
Option 1: Preseason Lottery
When: Weekly lotteries run from November to May, 24 weeks in advance of your trip start date (e.g., for a July 1 start, apply January 5–11).
How:
- Visit recreation.gov and select “Yosemite Wilderness Permit.”
- Choose a Half Dome-eligible trailhead (e.g., Happy Isles, Glacier Point, or Lyell Canyon—see full list on the site and below).
- Request entry dates and group size (up to 6 people recommended for Half Dome).
- Pay the $10 application fee + $5/person reservation fee.
- Results posted Monday evening after the 7-day lottery window; confirm by Thursday 11:59 PM.
Option 2: First-Come, First-Served
When: Available in person at a Yosemite wilderness center (e.g., Yosemite Valley Wilderness Center) on your trip start date, 8 AM–5 PM. How: Request a Half Dome-eligible trailhead permit; availability is limited. NPS Link: Wilderness Permits
Add Half Dome Permit
When: Pick up your wilderness permit in person the day before or day of your trip. How:
- Go to a wilderness permit station (e.g., Yosemite Valley, Tuolumne Meadows).
- Request Half Dome permits for your group (up to available quota).
- Pay $10 per person (non-refundable, paid on pickup).
Note: Only certain trailheads qualify for Half Dome permits—Happy Isles to Little Yosemite Valley, Glacier Point to Little Yosemite Valley, Sunrise Lakes, Lyell Canyon, Rafferty Creek to Vogelsang, or Mono Meadow.
Tips and Important Notes
No Guarantee: Both lotteries involve luck. Pre-season success rates hover around 20–30%, lower on weekends; daily lottery odds vary by cancellations. Permits don’t include camping reservations—book separately if needed (e.g., Little Yosemite Valley campground requires a wilderness permit, not a campsite reservation).
Days Before the Hike
Hike and Sleep at Elevation
- Why: Half Dome tops out at 8,842 feet—altitude can hit hard if you’re not acclimated. If you can stay a few days in the Valley or even higher elevation campgrounds in the Park before hiking Half Dome, it is helpful.
- Acclimatization and Training:
- If you can, train with hikes at 6,000–8,000 feet 1–2 weeks prior (e.g., Mt. Whitney, Mammoth Lakes trails, or local peaks). Practice 10+ mile hikes with 3,000+ feet elevation gain. We are from Georgia and hiked in the North GA Mountains, including the parts of Appalachian Trial to train.
- Hike in Yosemite a few times beforehand. We spent a day hiking Tuolumne Meadows (~10k feet) our first day in Yosemite. Then we were able to hike from the Valley to Yosemite Falls two days before, a tough hike, saving the day before Half Dome for more leisurely activities and rest.
Day of Hike
- Check Conditions: Visit nps.gov/yose/planyourvisit/conditions.htm for cable status and weather updates—thunderstorms can make the summit deadly. (Connectivity on the trail is intermittent.)
2. Water Filter: There is no potable water after Happy Isles. For this hike, you need 3–4 liters of water. A hydration pack is handy, and having a filter is great. We recommend a small hydration pack that can store snacks and extra layers.
- Where: Filter from the Merced River at Little Yosemite Valley or near Nevada Fall. Streams may dry up late summer—check conditions.
- Gear: Lightweight options like Sawyer Squeeze or Katadyn BeFree work well. Bring a backup bottle. Packages of electrolytes to add to your water are also a good idea on summer days.
- Tip: Start with 1–2 liters and refill to avoid carrying too much weight early.
3. Early Start
- Why: Avoid crowds on the cables, beat afternoon heat, and reduce lightning risk (summer storms peak midday).
- When: Start at 5–6 AM from Happy Isles. Headlamps are a must predawn. We left our campsite at 5:00 and started the trail around 5:15.
- Tip: Drive and park near Curry Village at the Trail Head Parking lot (see map above) if needed, then walk to the trailhead. Shuttle buses run early in summer, but check schedules. They don’t typically run as early as you may want to get started.
🧳 What to Bring
- 📃 Permit + photo ID
- 🥾 Sturdy hiking boots or trail runners
- 🧤 Grippy gloves. We recommend weight-lifting gloves.
- 💧 3–4 liters of water (filter or iodine tabs optional). Hydration pack and electrolyte packets recommended.
- 🚶♂️Trekking poles (especially helpful on steep sections)
- 🍫 High-energy, calorie-dense snacks and lunch
- 🧢 Hat, sunglasses, and sunscreen
- 🔦 Headlamp (for early start or late return)
- 🧥 Warm layers and extra socks (weather can change quickly)
- 🩹Small first aid kit; bandaids for blisters
Be sure to check out our guide on day hiking, including tips on gear.
🏕️Where to Stay
Staying in Yosemite Valley is the way to go. But you need to book a reservation as soon as you know your hike date. We managed to get a site at the Upper Pines campground which is closest to the trailhead. We had less than a half-mile walk to get to Happy Isles, avoiding a longer walk, or driving and finding a parking spot. In fact, our site was closer to the trailhead than the trailhead parking.
The other campgrounds, just a little further away, are North Pines, Lower Pines, or the Yurts at Curry Village. I would recommend the Yurts, although they are a bit more expensive, since they are near the showers and other amenities.
Tip: Arrive in Yosemite early and sleep at elevation (e.g., Tuolumne Meadows or a high campground) to adjust.
✅ Final Thoughts

Half Dome is a bucket list hike for a reason. It combines waterfalls, wilderness, sweat, fear, triumph—and views you’ll carry with you forever. And visiting Yosemite Valley is a bucket list adventure in and of itself.
Train, plan ahead, and treat this adventure with the respect it deserves. If you reach that summit, you’ll be part of a special group who’ve earned the right to say:
“I Hiked Half Dome.”
Related Guides
How to Get Fit for Travel: Walk Farther, Spend Less, and See More
Check out our Hikes Page for guides to other epic hikes